Install DocuWare Ivy
The image carries the DocuWare-branded Portal already. There is nothing to deploy by hand.
Start from Prepare the environment: this page
assumes a Linux host with Docker, reachable over ssh from Windows.
Plan 30 minutes. Most of the work is on your Windows machine; the Linux part is four commands.
The whole thing, in order
What |
Where |
|
|---|---|---|
1 |
a decision, no commands |
|
2 |
Windows, in Notepad |
|
3 |
Windows, |
|
4 |
Linux, |
|
5 |
Windows, through an SSH tunnel |
|
6 |
Linux. Do not skip |
|
7 |
Engine Cockpit |
|
8 |
browser |
Three things fail quietly, and all three have a check in this guide: the licence, the mail server, and using the wrong image.
How to read the commands
Anything in angle brackets is yours to replace, brackets included. The examples all use the same three values:
Placeholder |
Example |
What it is |
|---|---|---|
|
|
the user you created on the Linux host |
|
|
its address |
|
|
the folder path printed in step 3 |
Every command block says which machine it belongs to. Unmarked ones are on the Linux host.
Most Linux commands print nothing when they work. An empty response is the good outcome.
1 · Choose the image
Image |
Use it when |
|---|---|
|
this one, unless you know otherwise. Search works with no setup |
|
only if you already run an OpenSearch cluster and want the engine to use it |
It is the default in the Compose file, so there is nothing to change.
Which tag to use is a separate question. There are different tags for different release cycles, so pick the one that fits your context, or use the one DocuWare gave you. The bundle ships with a working default, and the DocuWare Ivy team can tell you which tag is right for an installation.
2 · Fill in two files
On your Windows machine, in Notepad, before anything is copied. Editing files inside a Linux shell is the part people find hardest, and this way you never have to.
Make a folder, for example C:\ivy-install, and extract the
installation bundle into it:
C:\ivy-install\
├── docker-compose.yml     leave as delivered
├── compose.sso.yml        leave as delivered
├── env.example            edit, then save as .env
└── config\
    ├── ivy.yaml           edit
    ├── licence.lic        your licence file, renamed
    ├── context.xml        leave as delivered
    ├── log4j2.xml         leave as delivered
    ├── mode.sso.env       leave as delivered
    ├── mode.entra.env     leave as delivered
    └── proxy\
        ├── appsettings.sso.json      leave as delivered
        └── appsettings.entra.json    leave as delivered
Two files are edited, env.example and config\ivy.yaml,
and the licence is yours to put in place. Everything else arrives ready to
use and is never edited: an installation is described by .env.
The files most installations touch are published on their own as well, if you would rather take them one at a time: docker-compose.yml, env.example and ivy.yaml.
env.example — five values
Line |
Replace with |
|---|---|
|
your SQL Server and the database you created for Ivy. Keep the shape
exactly: semicolons, and the database as |
|
the login that owns that database |
|
that login's password. Letters and digits only — see the warning below |
|
the tag for your release cycle, never |
|
your time zone as |
One more line is worth knowing about even though most installations leave it alone:
Line |
When to change it |
|---|---|
|
when something on this host already listens on 8080. It is the only
port the installation publishes, so this is the number every command on
this page and the IIS rule both refer to. Change it here rather than in
the Compose file, and remember that the rest of this page writes
|
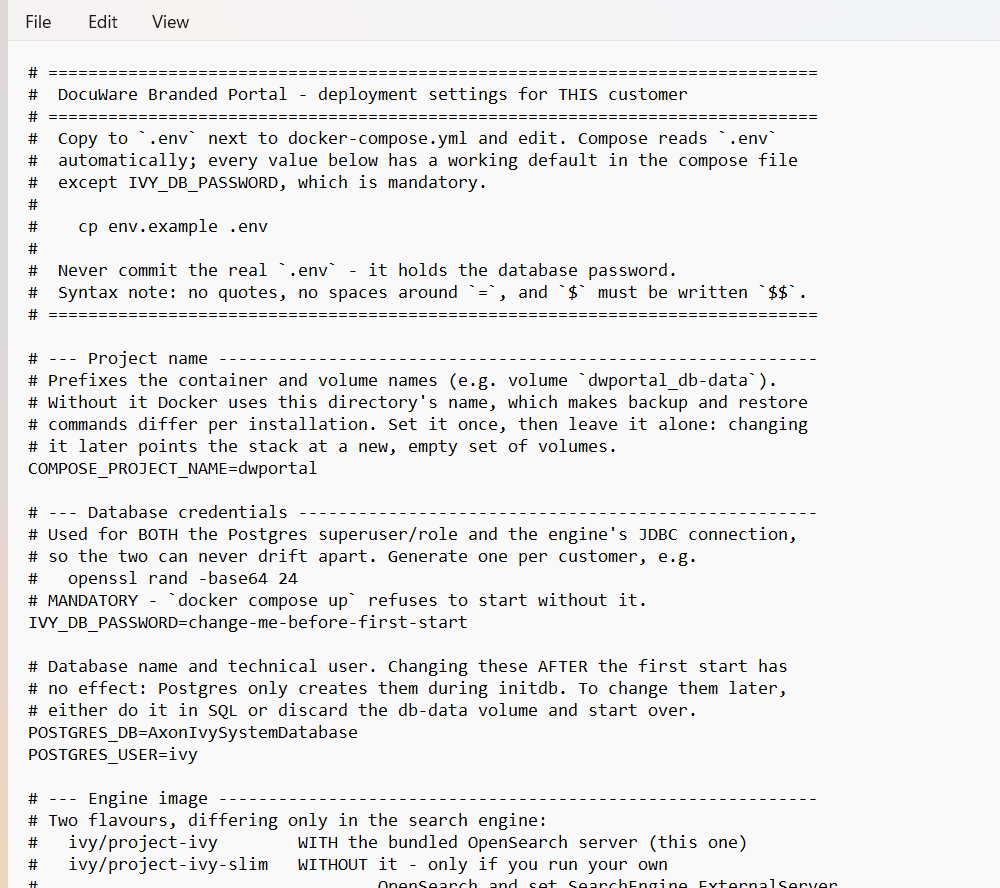
Figure 2 Most of the file is comments, which start with #. You are looking for
the handful of lines that are not.
Save it, and leave the name as env.example — step 3 renames it on the
way.
config\ivy.yaml — two values
The administrator password. Find this line and replace only
REPLACE-THIS-BEFORE-FIRST-START:
Keep the quotation marks, ${hash: and the closing }.
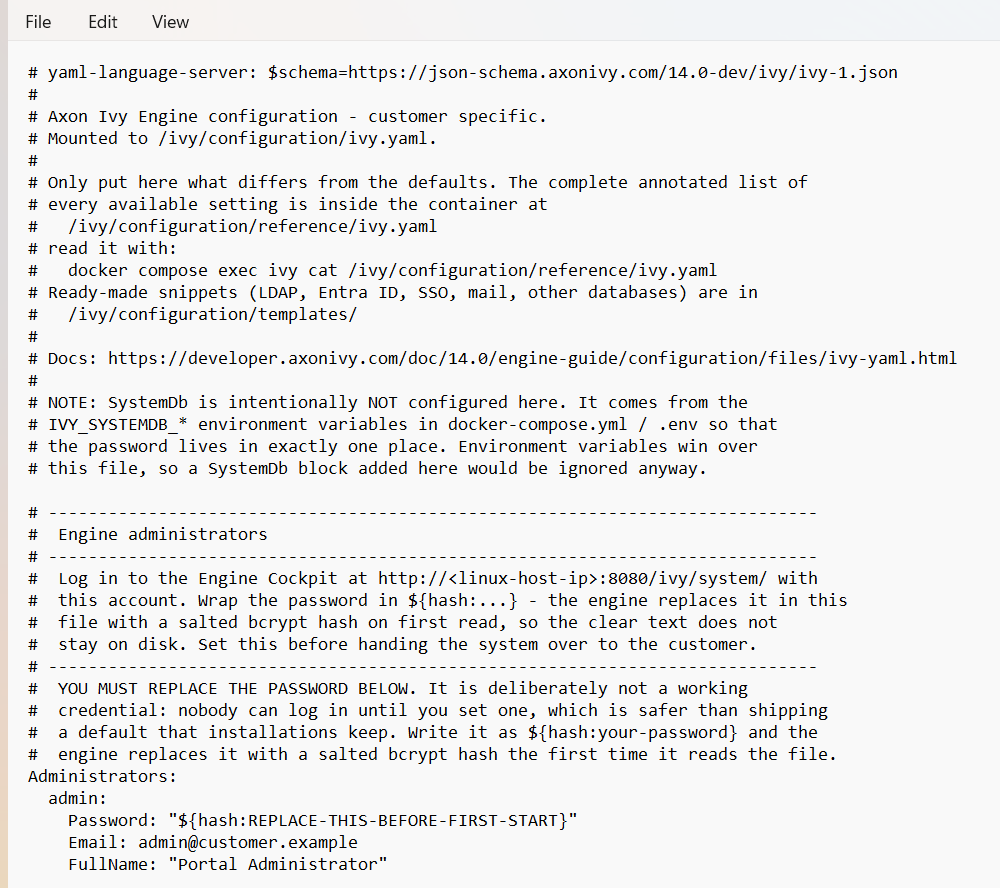
Figure 3 The Administrators block is the first thing to change.
The mail server. Further down, every line of the mail block starts with
#, which means "ignore this line". Remove the # and the space
after it from the lines you need:
# EMail:
#   Server:
#     Host: smtp.customer.example
#     Port: 587
#     MailAddress: portal@customer.example
#     EncryptionMethod: START_TLS
3 · Copy them to the Linux host
On the Linux host, create the destination and print its path:
mkdir -p ~/ivy/config && cd ~/ivy && pwd
You should see the full path, for example /home/ivyadmin/ivy. The
next commands need it, spelled out in full.
In a second PowerShell window on Windows, four copies:
cd C:\ivy-install
scp docker-compose.yml <your-user>@<linux-host>:<path-from-pwd>/
scp env.example        <your-user>@<linux-host>:<path-from-pwd>/.env
scp config\ivy.yaml    <your-user>@<linux-host>:<path-from-pwd>/config/
scp config\licence.lic <your-user>@<linux-host>:<path-from-pwd>/config/
cd C:\ivy-install
scp docker-compose.yml ivyadmin@192.168.10.20:/home/ivyadmin/ivy/
scp env.example        ivyadmin@192.168.10.20:/home/ivyadmin/ivy/.env
scp config\ivy.yaml    ivyadmin@192.168.10.20:/home/ivyadmin/ivy/config/
scp config\licence.lic ivyadmin@192.168.10.20:/home/ivyadmin/ivy/config/
Read a line as copy this local file, to that user, at that machine, into that
folder. The second one renames env.example to .env on the way,
which is the name Compose looks for.
Use the full path rather than ~, and run these in PowerShell rather than
Git Bash.
Back on the Linux host, clean up Windows line endings and confirm all four arrived:
cd ~/ivy
sed -i 's/\r$//' .env config/ivy.yaml
ls -l docker-compose.yml .env config/ivy.yaml config/licence.lic
You should see four lines, none of them zero bytes.
Then the log folder, which the engine writes to as uid 1000:
mkdir -p logs && sudo chown -R 1000:1000 logs config
Both print nothing. That is the expected outcome.
4 · Start
docker compose up -d
The first run downloads the image. You should see it end like this:
[+] Running 5/5
 ✔ Network dwportal_ivy-net    Created
 ✔ Volume dwportal_ivy-config  Created
 ✔ Volume dwportal_ivy-apps    Created
 ✔ Volume dwportal_ivy-data    Created
 ✔ Container dwportal-ivy      Started
Then watch the engine boot — two to four minutes:
docker compose logs -f ivy
You are waiting for one line:
Axon Ivy Engine is running and ready to serve.
Press Ctrl+C when it appears. That stops the watching, not the engine.
Started means the container started, not that the engine is ready. If
the log stops before that line, or the same messages repeat every few seconds,
the engine is restarting in a loop — go to step 6,
which names the cause.
5 · Open the portal
The Linux host has no browser. First confirm from the host itself:
curl -s -o /dev/null -w '%{http_code}\n' http://localhost:8080/ivy/docuware/project-ivy/
You should see 200.
To see it in a browser, forward the port through ssh so that your browser
addresses localhost:
ssh -L 8080:localhost:8080 ivyadmin@192.168.10.20
Leave that window open. Then, in the browser:
What |
Address |
|---|---|
Portal |
|
Engine Cockpit |
|
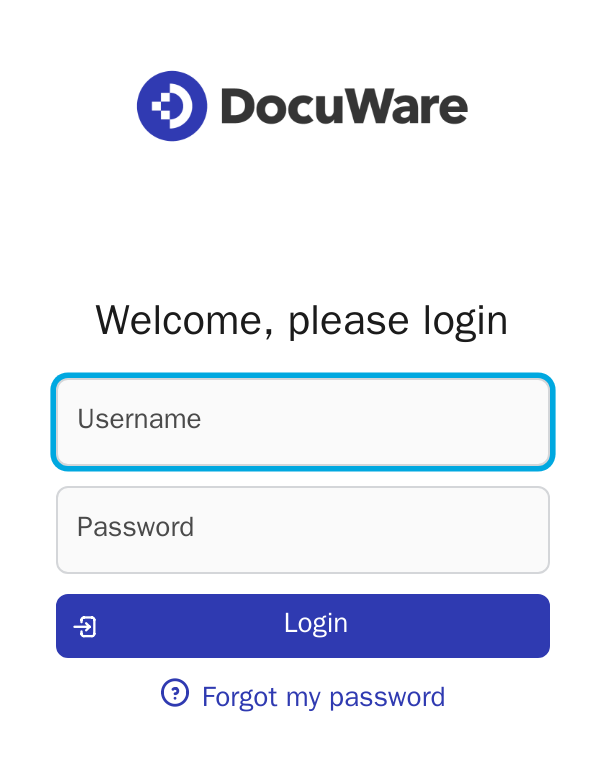
Figure 4 The portal, with its styling. Plain black-on-white text instead means the page arrived and its stylesheets did not.
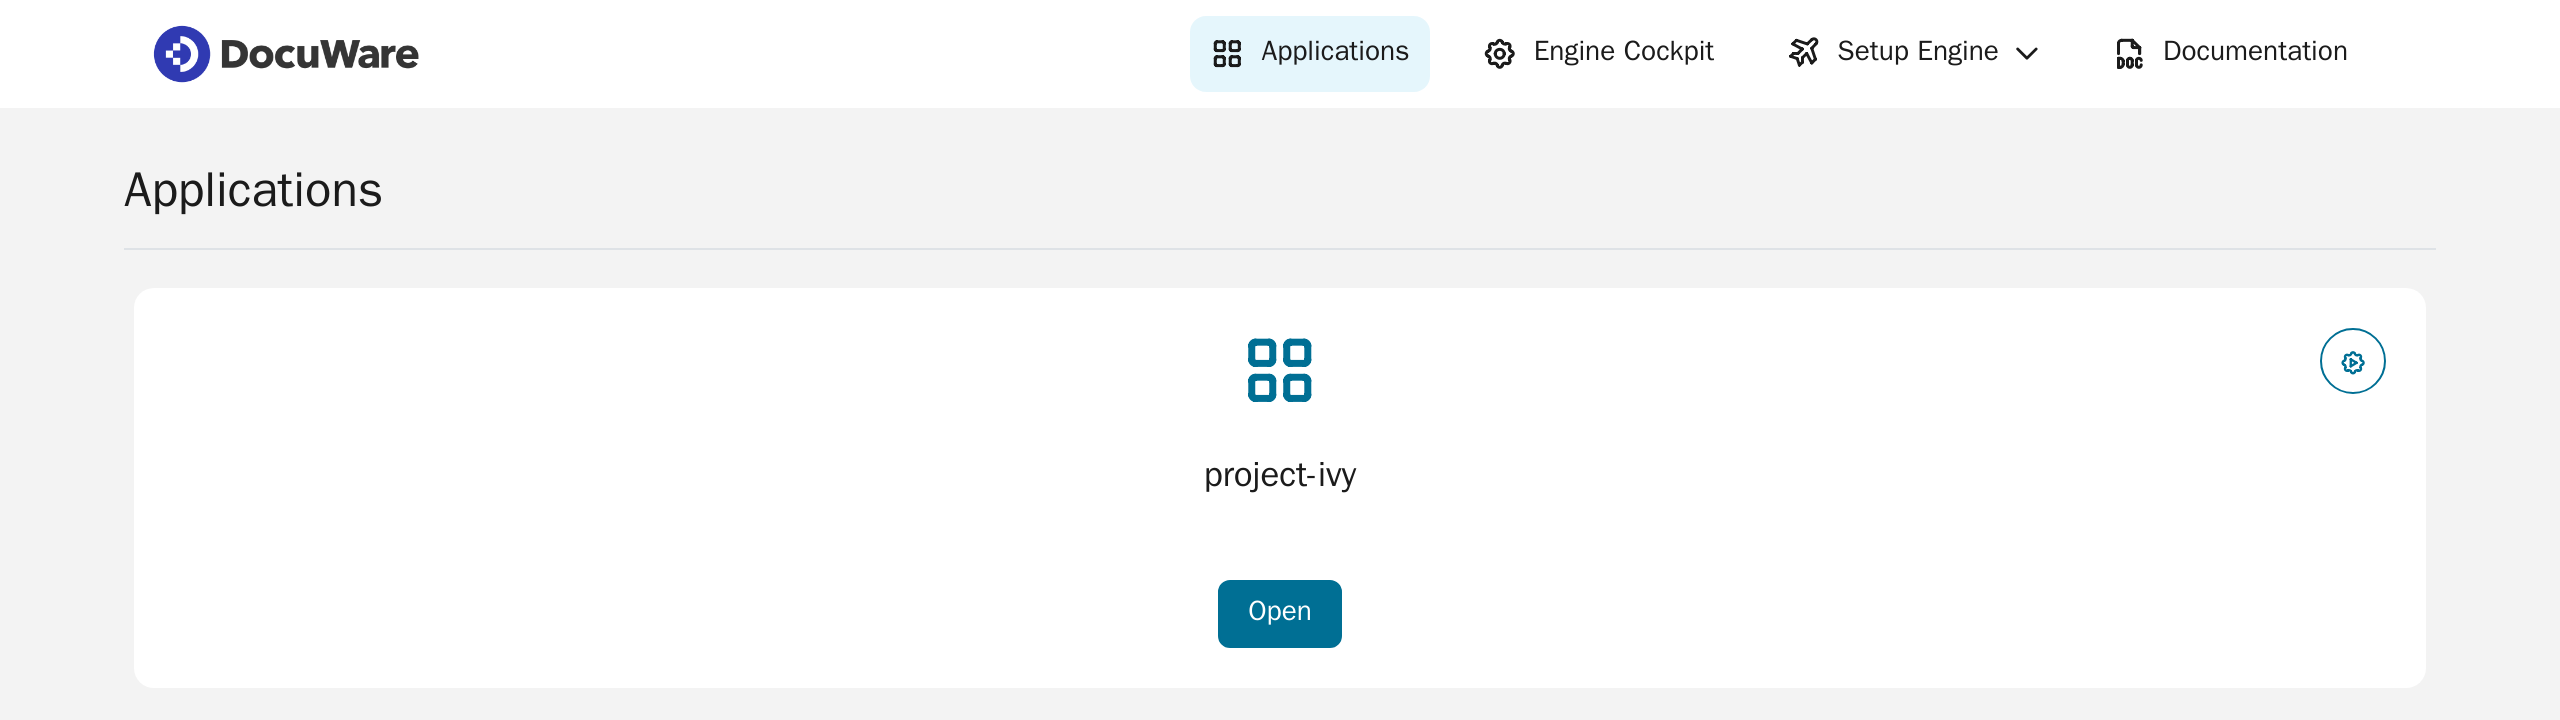
Figure 5 At the Cockpit address, the tile named project-ivy is the branded
portal the image deployed by itself.
6 · Four checks
The engine reports itself healthy in situations where the installation is unusable. Run all four, and again after every upgrade.
Check 1 — the right image, the container healthy
docker compose ps
You should see one line, Up and (healthy), with the image you
chose:
NAME           IMAGE                                                STATUS
dwportal-ivy   docuwarepublic.azurecr.io/ivy/project-ivy:<your tag>  Up 4 minutes (healthy)
Check 2 — a real database, not demo mode
grep -E 'System Database Manager|Creating system database' logs/console.log
You should see your SQL Server named:
Creating system database 'jdbc:sqlserver://sql.customer.example:1433;databaseName=AxonIvySystemDatabase'.
System database was successfully created.
[ 22%] System Database Manager (Microsoft SQL Server) started [308ms]
The first two lines appear only on the very first start — that is the engine creating its tables inside the database you made for it.
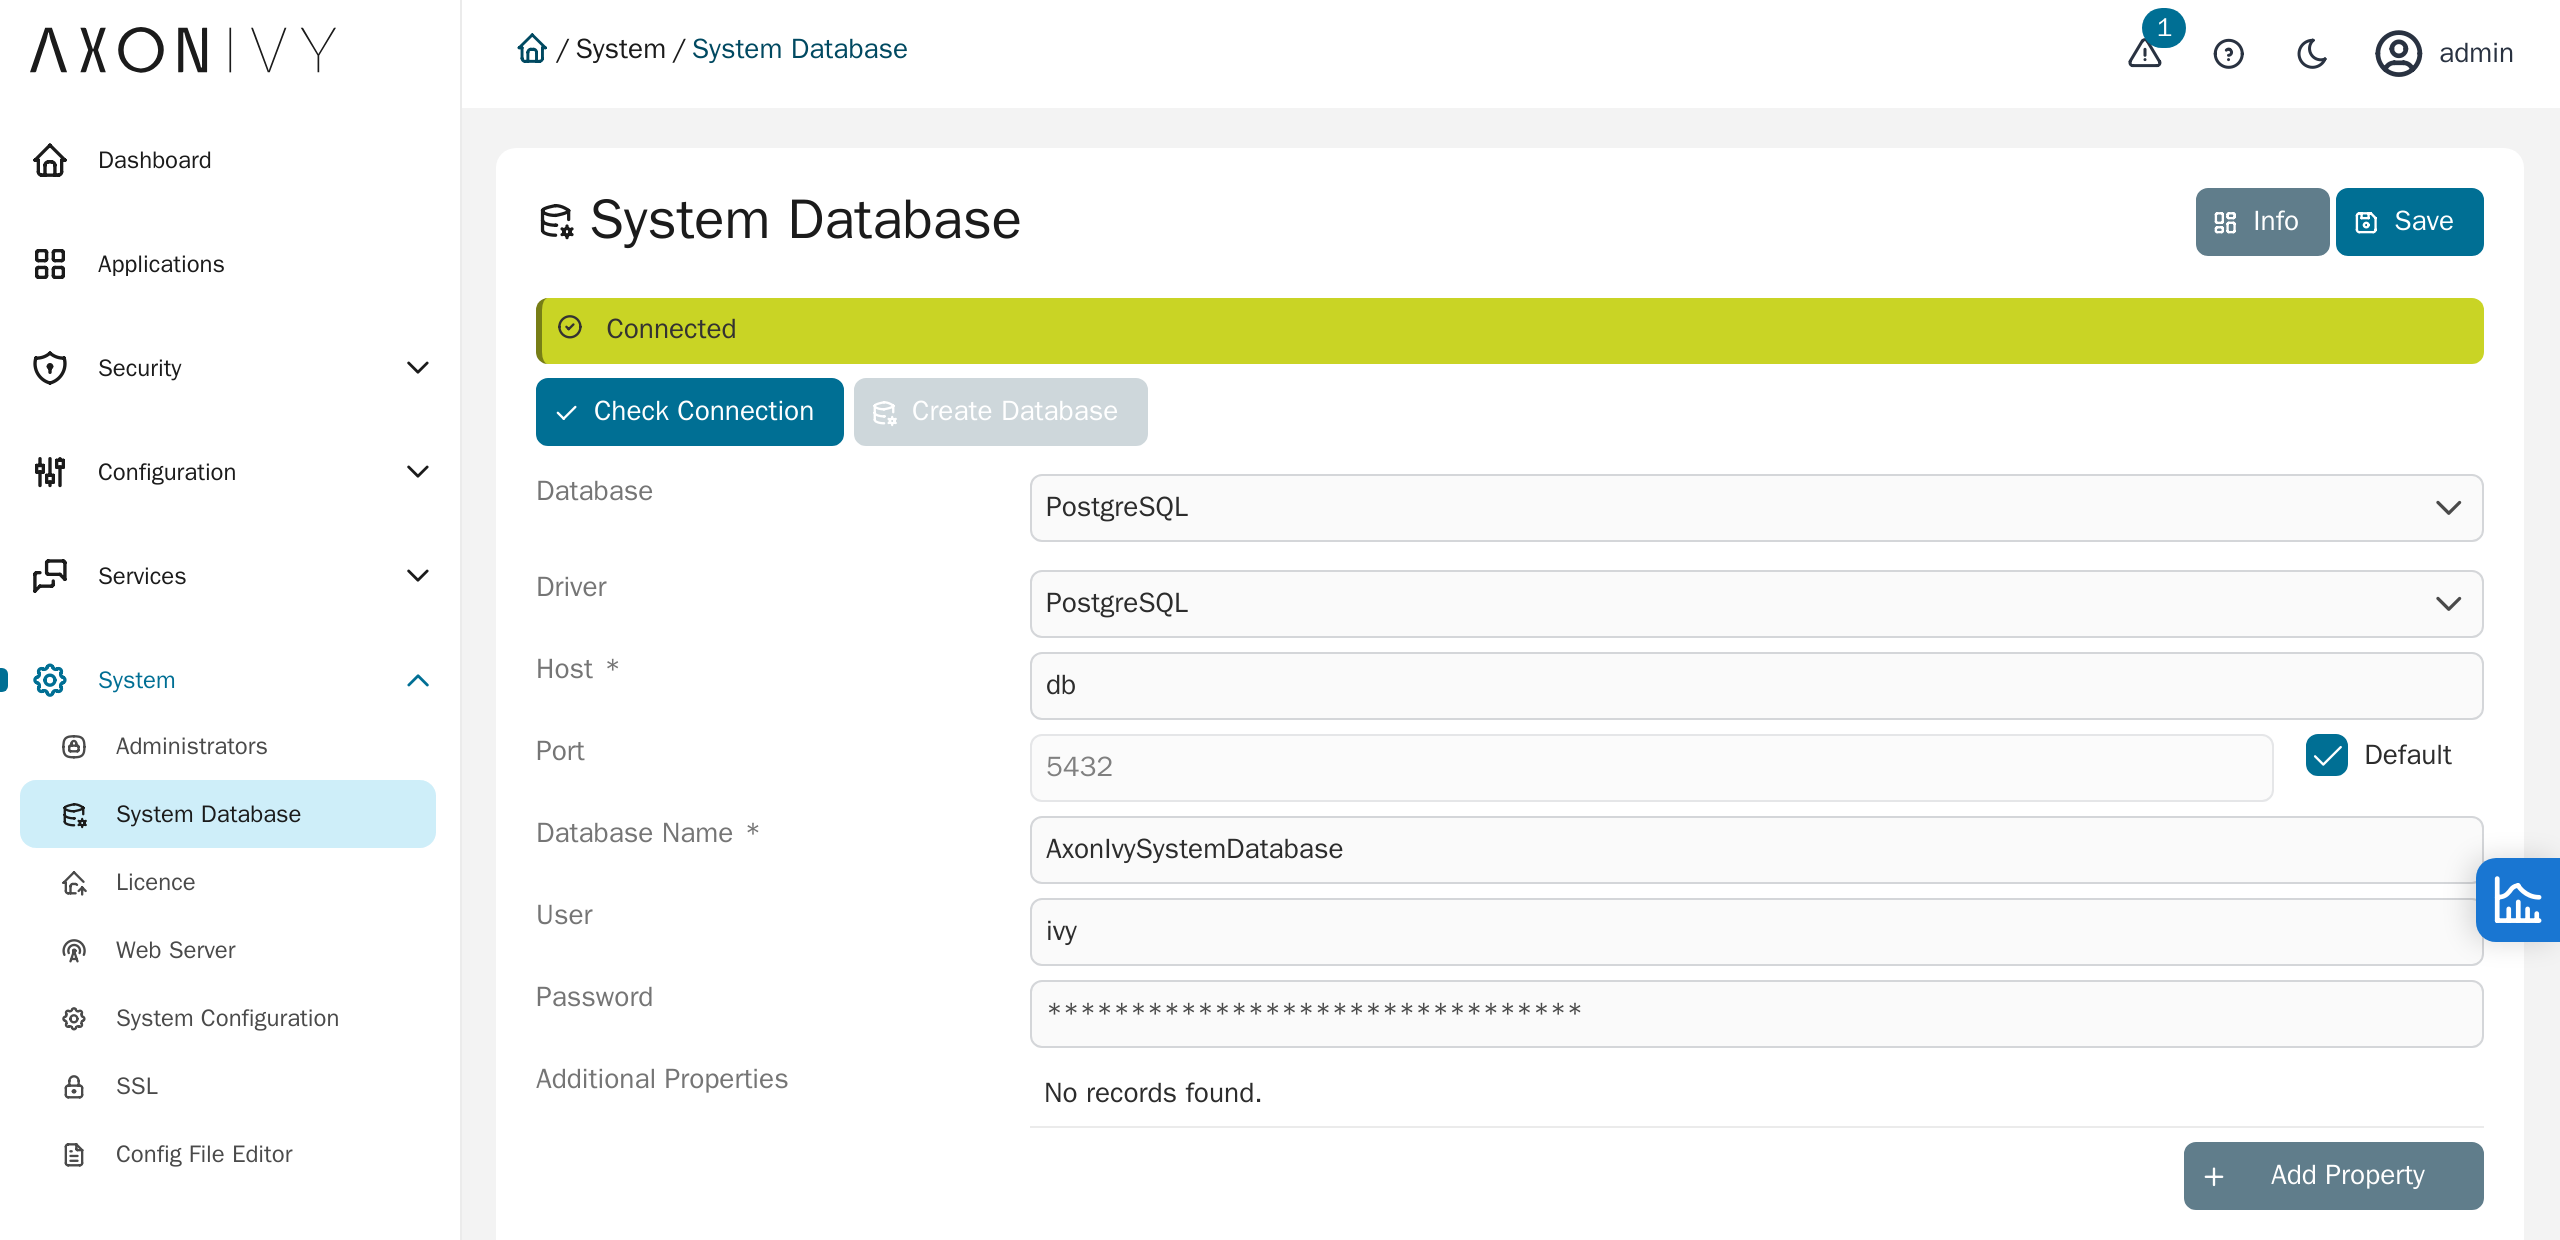
Figure 6 The same answer in the Engine Cockpit, for later: .
Check 3 — the application deployed
docker compose exec ivy sh -c 'find /ivy/deploy -name "*.deploymentLog" -exec grep -E "Convert project|reached state" {} +'
You should see exactly one line:
Info: Application has reached state 'STARTED'
Check 4 — the portal answers
curl -s -o /dev/null -w '%{http_code}\n' http://localhost:8080/ivy/docuware/project-ivy/
You should see 200. 000 means nothing answered — still
booting, or stopped.
7 · Create the first user
With the tunnel from step 5 open, go to
http://localhost:8080/ivy/system/ and choose Engine Cockpit
from the top menu. Log in as admin with the password from step 2.
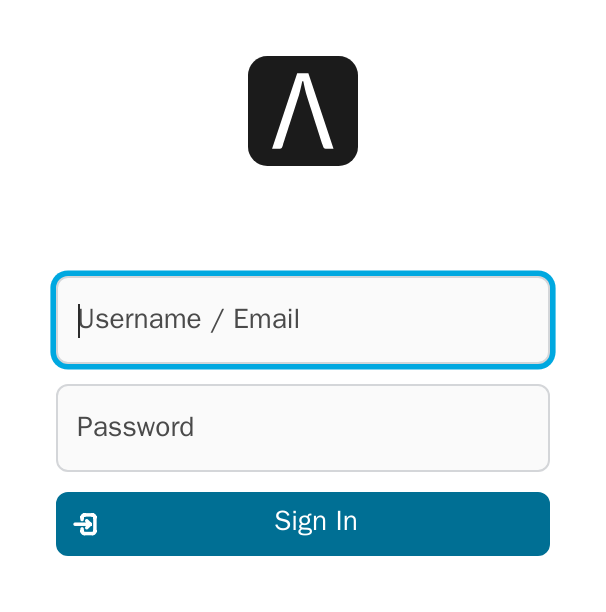
Figure 7 This looks nothing like the portal login, and that is correct: the administration interface is Axon Ivy's own and is not rebranded.
Then :
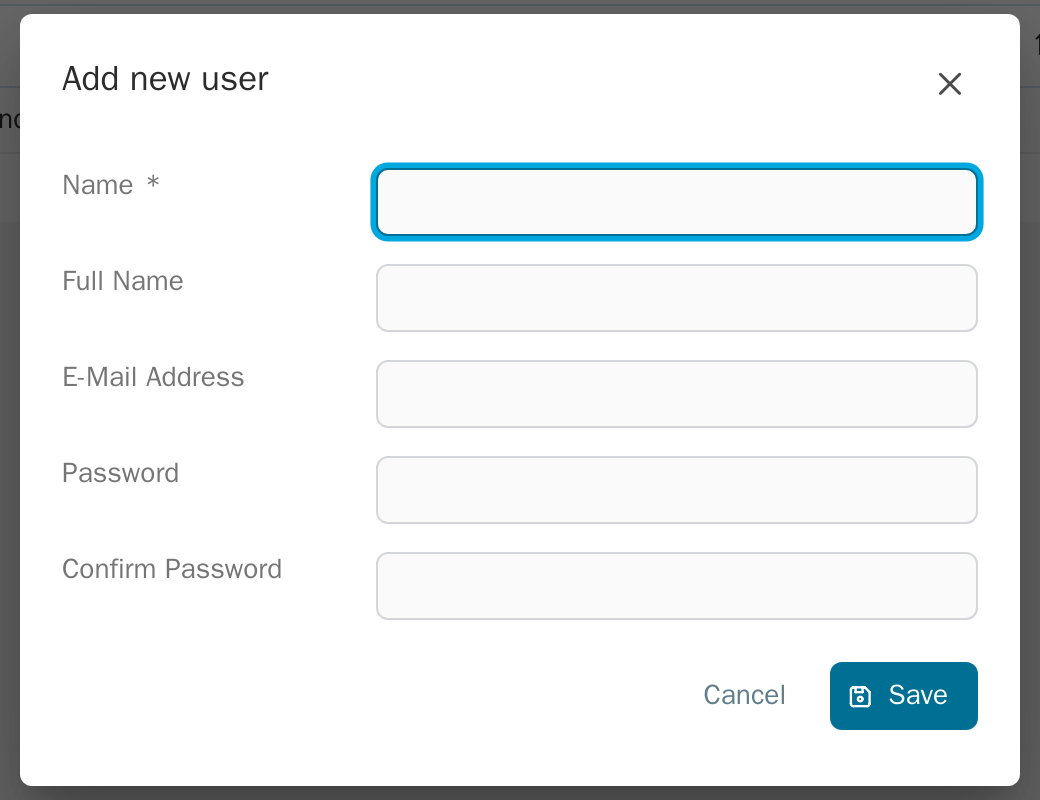
Figure 8 Only Name is mandatory, and it is the name this person types to log in.
Log in to the portal at http://localhost:8080/ivy/docuware/project-ivy/ with that
user.
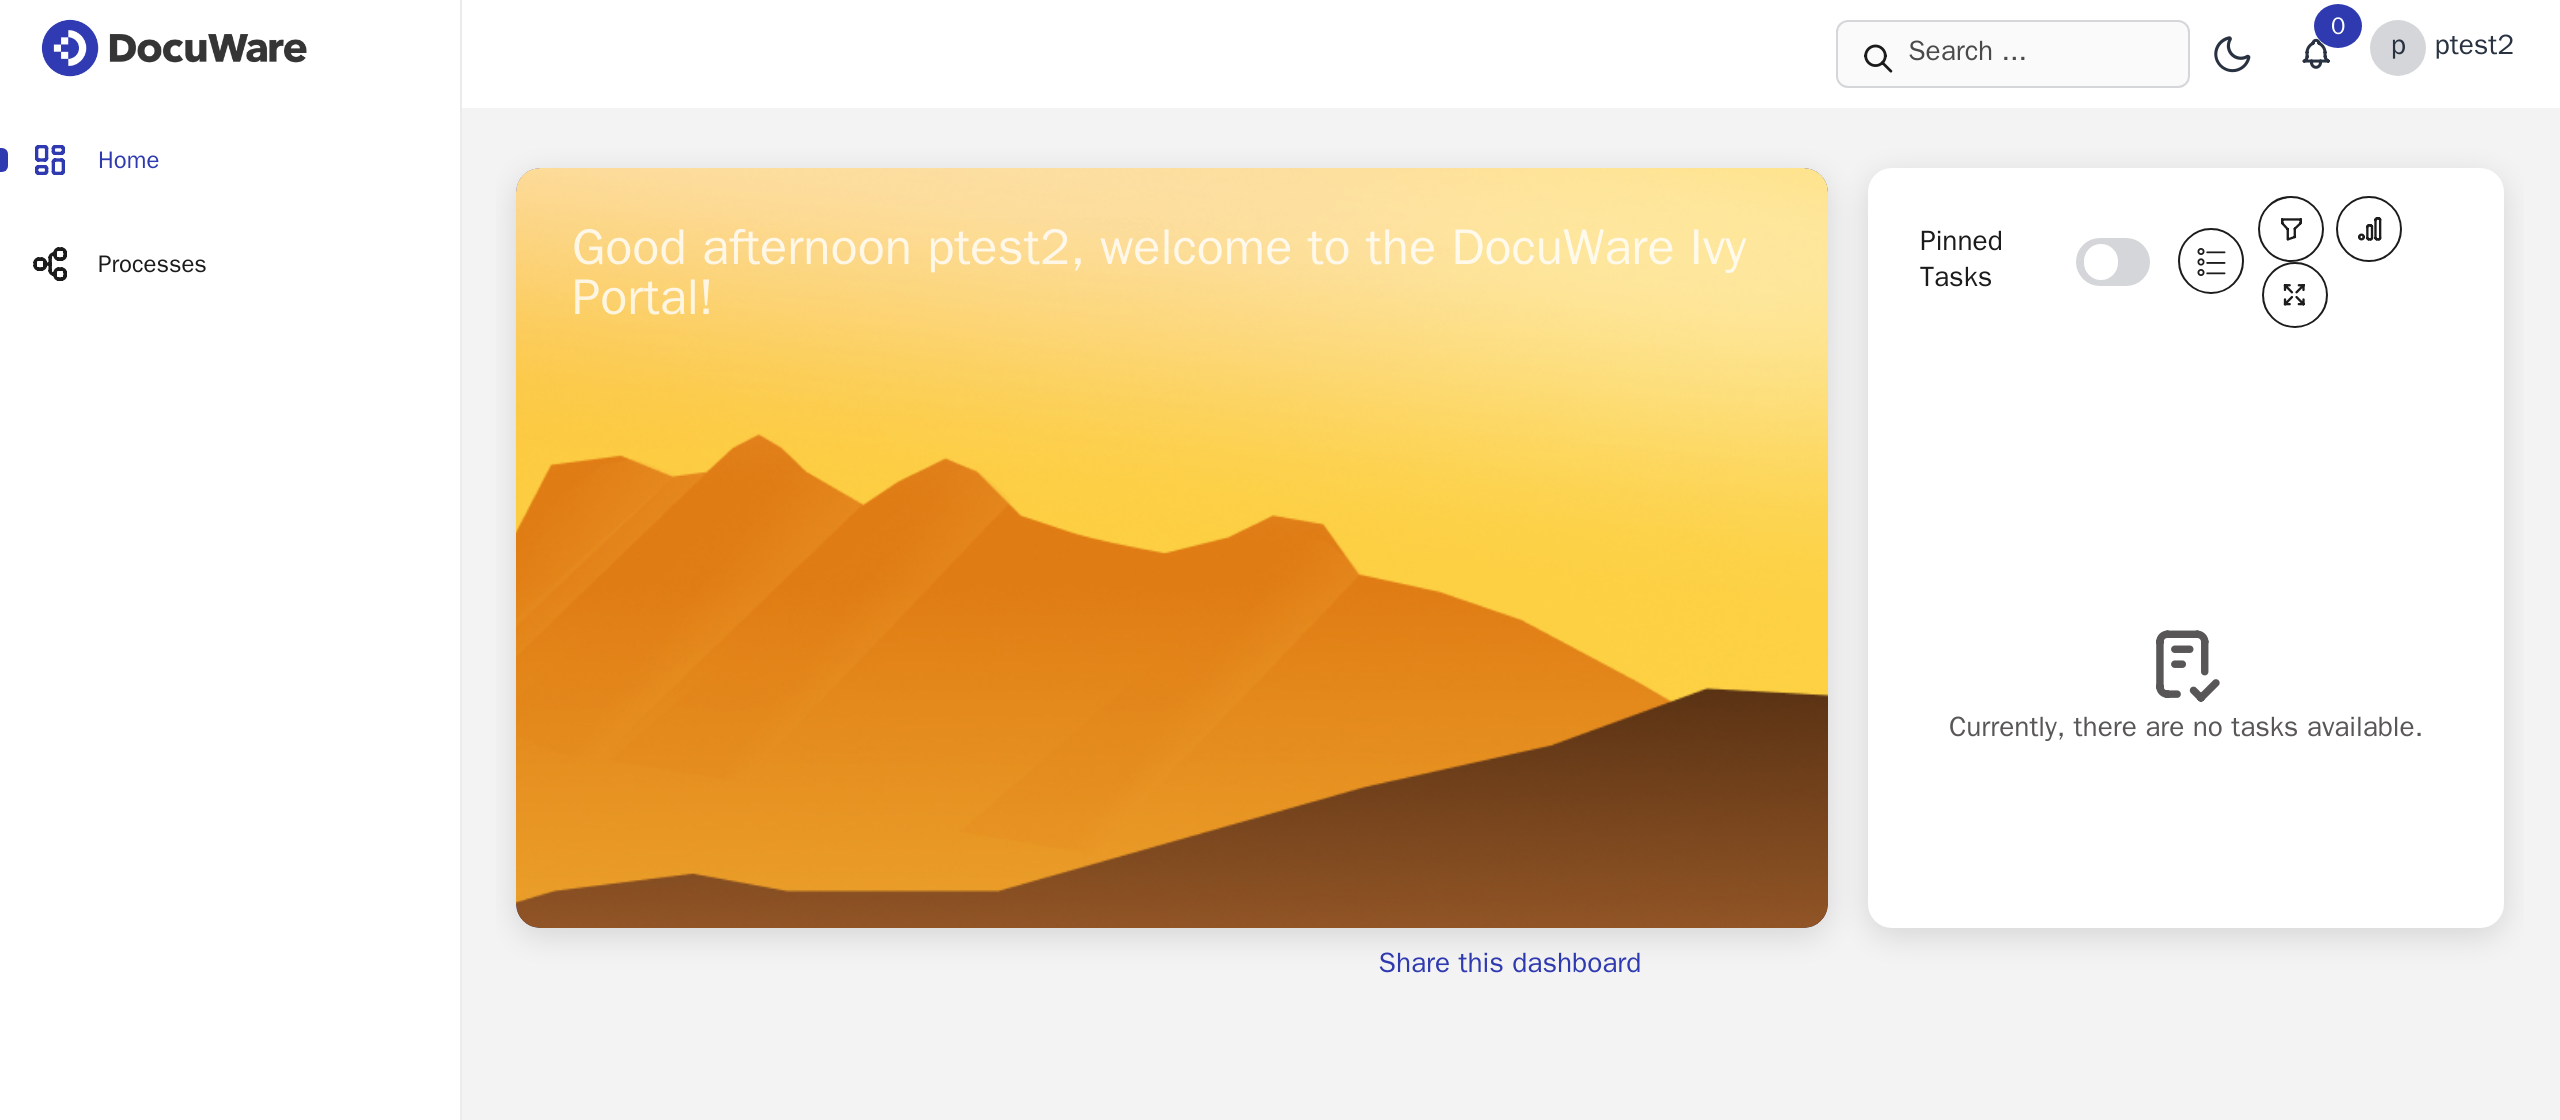
Figure 9 A finished installation. Currently, there are no tasks available is correct — nothing has created work yet.
8 · Confirm mail works
Nothing so far has sent a mail, so nothing has tested the setting from step 2. The Engine Cockpit tests it in two clicks — do that rather than guessing.
Open
http://<linux-host>:8080/ivy/system/and log in as the administrator from step 2.On the dashboard, read the Email panel. It shows the settings in force, which is the only reliable check that your edit was read:
Field
Not configured
Configured
Server
empty
smtp.mycompany.examplePort
-1587Mail address
noreply@ivyserver.localyour sender address
Click Send Test Mail, fill in To and Subject, and click Send.
You should see Success, and the Log pane ending in:
MAIL FROM:<ivy-portal@mycompany.example>
250 2.1.0 Ok
RCPT TO:<you@mycompany.example>
250 2.1.5 Ok
...
250 2.0.0 Ok: queued as 6sfACmlcQ85eYIqf0KcIRd
DEBUG SMTP: message successfully delivered to mail server
The Log pane prints the whole SMTP conversation, so a refused sender, a failed login or a blocked port names itself there.
Once mail works, the portal's Forgot my password page works too. It answers "If this e-mail address is registered then we have sent a password recovery link to it" whether or not the address matched, so it is not a test of your mail settings — the Cockpit dialog above is.
9 · Upgrading
A new image appears every two to three weeks. Nothing updates itself.
Set the new version in .env — nano .env — then:
docker compose pull ivy && docker compose up -d ivy && docker compose logs -f ivy
Afterwards re-run all four checks from step 6. An upgrade can change the answer to every one of them.
10 · When something is wrong
What you see |
What to do |
|---|---|
|
Wrong folder. |
|
The group change has not taken effect. Log out and back in |
The engine restarts every few seconds |
Usually the licence file. |
|
No usable licence, so the engine is in demo mode and nothing is kept.
Put |
The engine starts healthy but a setting seems ignored |
A key at the wrong indentation. |
The engine will not start after you edited |
Look for a tab character before anything else. Tabs are not allowed in YAML and the error does not mention them |
The database login is refused |
A |
|
Nothing answered. Still booting, or stopped |
Browser shows nothing, but check 4 says |
The |
|
Expected. The licence covers |
Login failed in the portal |
Right engine, spelling, password — in that order. Both are case-sensitive |
"Exception while sending email to you" |
The mail server is not set or not reachable. Step 8 |
The portal loads without styling |
The page arrived and its stylesheets did not. Check the address,
including the |
11 · Reporting a problem
Send these three outputs. They identify the build exactly.
docker image inspect $(docker compose config --images | grep project-ivy) \
  --format '{{index .RepoDigests 0}}{{"\n"}}{{json .Config.Labels}}'
grep -m2 -E 'Version 14|Axon Ivy Engine' logs/console.log
docker compose exec ivy sh -c 'find /ivy/deploy -name "*.deploymentLog" -exec head -40 {} +'
Plus logs/ivy.log and logs/console.log. To get them onto Windows: